Light Fixture Installation Manual: A Comprehensive Guide
This manual details upgrading spaces with energy-efficient LED fixtures, modernizing room aesthetics, and providing essential installation steps for a safe and effective process.

Safety Precautions
Prioritize safety during light fixture installation! Always turn off the power at the breaker box before commencing any work. Verify the power is off using a non-contact voltage tester. Wear appropriate safety glasses to protect your eyes from falling debris.
Use a sturdy ladder and ensure it’s securely positioned. Never work with electricity in wet conditions. If unsure about any step, consult a qualified electrician. Incorrect wiring can lead to fire hazards or electrical shock. Follow all local electrical codes and regulations for a safe installation.

Essential Tools and Materials
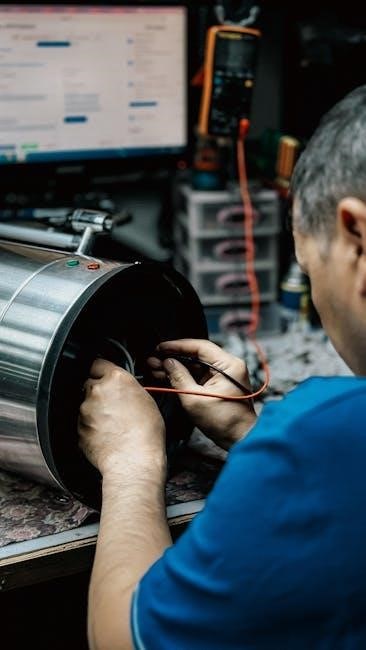
Gathering the right tools is crucial for a smooth installation. You’ll need a screwdriver set (flathead and Phillips), wire strippers, wire nuts, electrical tape, a non-contact voltage tester, and pliers. A ladder is essential for reaching the fixture.
Materials include the new light fixture, mounting bracket (if needed), appropriate wire connectors, and potentially drywall anchors. Ensure the fixture is compatible with your existing junction box. Having these items prepared beforehand streamlines the process and enhances safety.
Understanding Light Fixture Types
Different fixtures require varied installation approaches. Flush mount fixtures sit directly against the ceiling, offering a low profile. Semi-flush mounts have a small gap, providing a bit more decorative space.
Chandeliers and pendants hang down, needing secure support and potentially longer wiring. Understanding the fixture type dictates the mounting bracket and wiring techniques. Consider the weight and size when selecting appropriate hardware for a safe and aesthetically pleasing result.
Flush Mount Fixtures
Flush mounts are ideal for lower ceilings, providing ample illumination without significant hanging space. These fixtures attach directly to the junction box, simplifying installation. Ensure the mounting bracket is securely fastened, supporting the fixture’s weight.
Wiring is straightforward, connecting the fixture wires to the house wiring using wire nuts and electrical tape. Confirm a snug fit and proper insulation before mounting the fixture flush against the ceiling, creating a clean, integrated look.
Semi-Flush Mount Fixtures
Semi-flush mounts offer a balance between flush mounts and chandeliers, featuring a short gap between the fixture and the ceiling. Installation involves a mounting bracket, similar to flush mounts, but allows for a decorative element to extend downwards.
Carefully align the fixture with the bracket, ensuring secure attachment. Wiring procedures remain consistent – connect wires with nuts and tape. These fixtures provide enhanced style while maintaining practicality for various room sizes and ceiling heights.
Chandeliers & Pendants
Chandeliers and pendants introduce dramatic flair, often requiring more robust ceiling support due to their weight. Installation necessitates a securely mounted bracket capable of handling the fixture’s mass.
Carefully follow the manufacturer’s instructions for assembly and attachment. Wiring connections are crucial; ensure proper grounding and secure wire nut connections. Adjust chain or cord length for desired height and aesthetic appeal, creating a focal point within the space.
Preparing for Installation
Prior to commencing any electrical work, meticulous preparation is paramount for safety and success. Begin by turning off the power to the circuit at the breaker box, verifying with a non-contact voltage tester.

Next, remove the old fixture carefully, noting the wiring configuration. Inspect the junction box for damage and ensure it’s securely mounted. Gather all necessary tools and materials, referencing the provided list, to streamline the installation process.
Turning Off the Power

Safety is the utmost priority; therefore, completely disconnecting the electrical supply is crucial before any work begins. Locate the circuit breaker controlling the light fixture and switch it to the “off” position.
Always double-check that the power is indeed off using a non-contact voltage tester at the fixture’s wires. Never assume the breaker is correctly labeled; verification is essential to prevent electrical shock and ensure a safe working environment.
Removing the Old Fixture
With the power safely disconnected, carefully remove the old light fixture. Begin by unscrewing any decorative elements or covers. Support the fixture’s weight as you disconnect the wiring, noting the wire connections for reference during the new fixture installation;
Gently lower the fixture and detach it from the mounting bracket. Inspect the junction box for any damage and address it before proceeding.
Installing the Mounting Bracket
Securely attaching a new mounting bracket is crucial for supporting the fixture’s weight. Ensure the bracket is compatible with your junction box and the new light fixture. Align the bracket holes with the box’s mounting points.
Use appropriate screws to firmly fasten the bracket, avoiding over-tightening. This bracket will hold the new light securely in place, providing a stable foundation for the installation process.
Securing the Bracket to the Junction Box
Properly securing the bracket to the junction box is paramount for safety and stability. Utilize screws specifically designed for electrical boxes, ensuring they penetrate the box’s structure firmly.
Avoid stripping the screw holes by applying consistent pressure while tightening. A wobbly bracket indicates insufficient support; re-evaluate and reinforce if necessary. This foundational step prevents future fixture movement and potential electrical hazards.

Wiring the New Light Fixture
Carefully connecting wires is crucial for a functional and safe installation. Begin by identifying the hot (usually black), neutral (white), and ground (green or bare copper) wires.
Twist wires together clockwise, secure with wire nuts, and wrap with electrical tape for insulation. Ensure a tight connection to prevent shorts or loose wiring. Double-check all connections before proceeding, prioritizing safety throughout the process.
Identifying Wires (Hot, Neutral, Ground)
Accurate wire identification is paramount for safe electrical work. The hot wire, typically black, carries the electrical current. The neutral wire, usually white, provides the return path. The ground wire, often green or bare copper, is a safety conductor.
Always verify with a non-contact voltage tester before handling any wires. Incorrect wiring can lead to shocks or fire hazards, so proceed with caution and double-check your connections.
Connecting the Wires – Wire Nuts & Electrical Tape
Securely joining wires is crucial for a reliable connection. Twist the matching wires together clockwise, ensuring a firm mechanical bond. Then, screw on appropriately sized wire nuts, twisting until snug. Twist wires together clockwise, secure with wire nuts, then wrap with electrical tape for added insulation and safety.
Electrical tape further seals the connection, preventing accidental contact. Ensure no bare wire is exposed after applying the tape. A solid connection minimizes resistance and potential hazards.
Mounting the Fixture

Carefully lift the new light fixture into position, aligning the mounting holes on the fixture with those on the installed bracket. Gently guide the wires into the electrical box, avoiding any pinching or strain. Secure the fixture to the bracket using the provided screws.
Ensure the fixture sits flush against the ceiling or wall. Tighten the screws firmly, but avoid over-tightening, which could damage the fixture or bracket. Align screws through the bracket holes to finalize the mounting process.
Attaching the Fixture to the Bracket
Once wires are connected, carefully raise the fixture towards the mounting bracket. Align the fixture’s holes with the bracket’s screws. Gently push the fixture against the ceiling, ensuring a snug fit.
Secure the fixture using the provided screws, tightening them gradually in a criss-cross pattern. This ensures even pressure and prevents wobbling. Do not overtighten, as this could damage the fixture or the ceiling surface. Confirm a secure attachment before proceeding.
Testing the Installation
Before declaring success, meticulously test the newly installed light fixture. At the breaker box, carefully restore power to the circuit. Return to the fixture and switch it on. Observe if the light illuminates correctly and consistently.
Check for any unusual sounds, sparks, or smells. If everything functions as expected, congratulations! If issues arise, immediately turn off the power and revisit the wiring connections. Safety is paramount throughout this process.
Restoring Power & Checking Functionality
With wiring complete and secure, cautiously restore power at the breaker box. Return to the fixture and activate the switch. Verify the light turns on promptly and operates without flickering or dimming. Observe for any unusual noises, smells, or visible sparks – these indicate potential issues.
Confirm full functionality by cycling the light switch several times. If problems persist, immediately de-energize the circuit and re-examine all connections. Prioritize safety during this crucial step.
Troubleshooting Common Issues
Encountering problems? A non-functional fixture often stems from loose wiring or a tripped breaker. Double-check all connections and reset the breaker if necessary. Flickering lights frequently indicate a loose bulb, incompatible dimmer switch, or voltage fluctuations.
Inspect bulb compatibility and ensure the dimmer is rated for LED use. If issues persist, consult a qualified electrician to diagnose and resolve more complex electrical problems safely.
Fixture Doesn’t Turn On
If your newly installed fixture fails to illuminate, begin with the simplest checks. Verify the power supply is active at the breaker and that the switch controlling the fixture is turned on. Carefully inspect all wire connections within the junction box, ensuring they are secure and properly connected.
A loose connection is a common culprit. Confirm the bulb is correctly seated and functioning. If problems continue, a faulty fixture or wiring issue may require professional attention.
Flickering Lights
Persistent flickering can indicate several issues. First, ensure the bulb is compatible with any installed dimmer switch – not all LEDs are. Check wire connections within the junction box; loose wires can cause intermittent contact. A faulty dimmer switch itself could be the source of the problem, requiring replacement.
If flickering persists, the fixture or the circuit breaker may be experiencing issues, potentially needing professional evaluation and repair to ensure safety and functionality.
LED Light Fixture Specifics
LEDs offer significant benefits, including energy efficiency, longer lifespan, and reduced heat output compared to traditional bulbs. However, compatibility with dimmer switches is crucial; not all LEDs function correctly with all dimmers. Ensure the dimmer is specifically designed for LED fixtures to avoid flickering or reduced dimming range.
Modern LED fixtures provide substantial improvements in illumination quality and energy savings, making them a smart upgrade for any home or commercial space.
Benefits of LED Lighting
LED lighting dramatically reduces energy consumption, lowering electricity bills and minimizing environmental impact. Their extended lifespan—often lasting 25,000 hours or more—decreases replacement frequency and associated costs. LEDs also generate significantly less heat than incandescent bulbs, enhancing safety and reducing air conditioning demands.
Furthermore, LEDs offer instant-on functionality and superior light quality, creating a brighter and more comfortable atmosphere within any space.
Compatibility with Dimmers
Not all LED fixtures are compatible with standard dimmers; using an incompatible dimmer can cause flickering, buzzing, or reduced dimming range. Ensure the LED fixture and dimmer are specifically designed to work together, often indicated by “LED compatible” labeling on the dimmer switch.
Consider using a dimmer specifically engineered for LEDs to achieve smooth, full-range dimming control and maximize the benefits of your new lighting system.
Recessed Lighting Installation
Recessed lighting demands precision; specialized installation tools minimize frustration and maximize productivity. A tooling device can increase profitability while ensuring accurate placement and secure mounting. Carefully measure and mark locations before cutting, utilizing appropriate hole saws for clean openings.
Properly secure the fixture housings within the ceiling structure, ensuring they are level and firmly supported. Follow manufacturer guidelines for wiring and trim installation for optimal performance.
Using Installation Tools for Precision
Employing the correct tools is crucial for successful recessed lighting installation. Hole saws, designed for specific fixture sizes, ensure clean, accurate cuts in drywall or plaster. A stud finder locates ceiling joists, preventing damage to wiring or structural components.
Leveling tools guarantee fixtures are flush with the ceiling surface. Electrical testers verify power is off before wiring. Specialized drivers simplify screw fastening, enhancing speed and precision throughout the installation process.
Final Touches & Considerations
Deciding paint application order—before or after fixture installation—is a common dilemma. Experts suggest painting before to avoid paint on the new fixture. Carefully clean any dust or debris from the fixture surface post-installation.
Consider stock video resources like iStock for visual installation guidance. Ensure all wiring connections are secure and the fixture is firmly mounted. Properly dispose of old bulbs and packaging. Enjoy your newly illuminated space!
Paint Before or After Fixture Installation?
The age-old question sparks debate, but experts like Van Sureja recommend painting before installing the light fixture. This prevents accidental paint splatters on the new fixture’s finish, saving cleanup time and potential damage.
Masking around an installed fixture is tricky, and achieving clean lines can be challenging. Painting first allows for a smoother, more professional result. Ensure the paint is fully dry before proceeding with the installation process.
Stock Video Resources for Installation Guidance
iStock offers a wide array of high-quality “Install Light Fixture” stock videos in both 4K and HD. These resources provide visual guidance for various installation scenarios, aiding both DIY enthusiasts and professionals.
Accessing these videos can clarify complex steps, ensuring a more confident and accurate installation. All video clips are priced the same, regardless of resolution, offering excellent value. Utilize these visual aids to supplement written instructions and enhance your understanding of the process.

Advanced Features & Controls (DMX Integration)
DMX integration utilizes a USB Pro widget, virtual systems, and offers unlimited submasters for complex lighting control, including effects and memory storage.
DMX Pro Widget & Virtual Systems
The DMX Pro widget facilitates seamless control of lighting systems directly from a PC. For computers experiencing compatibility issues, a virtual system can be implemented to establish communication.
This allows for discussion and troubleshooting within a dedicated Discord channel (DLonDiscord). The system manages an unlimited number of submaster memories, capable of storing presets, circuit groups, or specialized effects.
Up to 5000 submasters can be loaded, providing extensive customization options for intricate lighting designs.
Submaster Memory & Effects
DMX systems offer extensive memory capabilities, allowing for the storage of numerous lighting configurations. These submasters can hold individual presets, groupings of circuits, or complex, dynamic effects.
Each submaster functions independently, enabling precise control and recall of specific lighting scenes. The system boasts the capacity to manage up to 5000 submasters, providing unparalleled flexibility for intricate designs.
This robust memory system empowers users to create and execute sophisticated lighting sequences with ease.